Everyone recognizes the problem: after a while your computer becomes slower, your disk space is full and you are chased on the internet by the same ads. Time for a clean start! We discuss the best tips to get your Windows 10 system in top condition and then keep it.
Tip 01: Clean up the browser
As soon as you start your browser, many websites already know who you are. You also leave traces everywhere and nowhere during surfing. As a result, after a night of searching for new shoes or your ideal barbecue, you will be bombarded for weeks with recurring advertisements. With the simple key combination Ctrl + Shift + Del you perform a thorough cleaning action in your browser. You can decide for yourself what you want to delete, for example stored passwords, cookies and other privacy-sensitive information. Depending on the browser you can also indicate from which moment you want to apply the cleaning action, for example the last hour, the last week or since the first use.
The shortcut works in Chrome, Firefox and Internet Explorer. In Edge (Windows 10), click on the three dots in the upper right corner of the screen and then select Settings / Choose what you want to delete. Safari users go to Edit / Reset Safari.
[su_note]Tip 01: Use the key combination Ctrl + Shift + Del to quickly restore your browser.[/su_note]
Tip 02: 18+ Content
 The previous tip is often applied by people who ‘accidentally’ have been lost for a while on 18+ websites. This makes the browser show the dubious web addresses in search engine or address bar. If you already know in advance that you will visit websites that you want to remove from your system later on, use your browser’s private navigation. Here you receive cookies and settings such as your history are saved, but only as long as you have the browser active. If you close the browser, all traces will be deleted automatically.
[su_note]You activate the private navigation in most browser via the key combination Ctrl + Shift + P. In Chrome the key combination is Ctrl + Shift + N and in Safari you go to Edit / Private mode.[/su_note]
Tip 03: Bookmarks
Do you have a wealth of bookmarks in your browser but are you starting to hit the chaos? Then it is time for a cleaning. Websites that no longer exist or are stored twice will pollute your collection of bookmarks. With the extension Bookmarks Checker (Firefox) or Bookmark Checker (Chrome) you can have your collection cleaned up. Before you automate your toolbox to allow your bookmarks to be cleaned up, it is always a good idea to back up your bookmarks. How this works for the most popular browsers you can read here.
[su_note]Have your bookmarks checked and cleaned by Bookmark (s) Checker.[/su_note]
Tip 04: Outlook.com attachments
The webmail services Google’s Gmail and Microsoft’s Outlook.com offer lots of storage space, but here too large attachments can take up too much space sooner or later. In Outlook.com you can quickly view the e-mails with the largest attachment. Then you can manually select and delete the messages. Log in to the webmail service, click Arrange and choose Size. The smallest e-mails now appear at the top. Choose Arrange / Size again and the largest mails are at the top. You restore the default order with Arrange on / Date.
Backup
Before you start experimenting with cleaning programs and optimizing Windows, it is always advisable to make a complete backup of your computer. Depending on your Windows version, there is another procedure for this, but you can also get started with EaseUS Todo Backup Free. This quickly makes a good backup of everything on your computer to an external hard drive.
[su_note]Todo Backup Free can back up your computer to an external hard drive.[/su_note]
Tip 05: Gmail attachments
If you want to see large attachments in Gmail, you need a special search. You can type this directly into the search field. With the command size: 20m older_than: 5y, Gmail shows all messages of at least 20 MB and older than five years. Mark the messages that you think take up too much space and remove them from your Gmail box.
Tip 06: Clean old mail
Many mail services and mail programs have a built-in routine to archive old messages, for example. Sometimes it is also possible to delete old messages. If you use IMAP or a webmail service that supports IMAP (for example Gmail), MailStore Home (see also box: ‘Mail back-up’) allows you to quickly delete older messages. Create a new profile with Archive archiving. A wizard guides you quickly through the setting process. Request the properties of your profile and view Delete in the second window. Here you can indicate that messages have to be removed from the server after a certain period, for example older than three years. This way you can keep your IMAP mailbox or webmail service clean! MailStore Home first creates a local copy of your messages on your computer.
Tip 07: Newsletters
Unwanted mail is a recurring problem. At first we mainly suffered from spam, but that is being better absorbed by spam filters. Newsletters and the flood of notifications from Facebook and other social media take a lot of time to click away. Unsubscribing is often difficult or we do not bother with it. Thanks to unroll.me it is much easier. The service makes an inventory of the ‘mess’ that enters your mailbox. Then you can ‘summarize and stop’ the messages so that you can view and process everything in one overview. Unroll.me can also help you with a quick cancellation. Unroll.me works with all known webmail services including Outlook.com, Yahoo Mail, iCloud and Gmail. Prevent blockage in the mailbox due to all kinds of social media reports and unwanted newsletters.
Back up mail
There are different ways to look at the Inbox phenomenon. Some people always want an empty mailbox (inbox zero) or clear daily / monthly / yearly outdated messages. Others use their mailbox as an eternal archive and then cleaning up large (tip 4 and 5) or old mail (tip 6) is useful. Whichever cleaning trick you use, a back-up is always good to have on hand! This is possible with MailStore Home. The program creates an archive file and adds your message folders, of course including all your mail. The MailStore Home archive is fully searchable, even without a mail program. MailStore Home works with all known desktop mail programs. It can also handle webmail services from Google and Microsoft or you can contact the mail server directly via POP or IMAP.
Tip 08: CCleaner
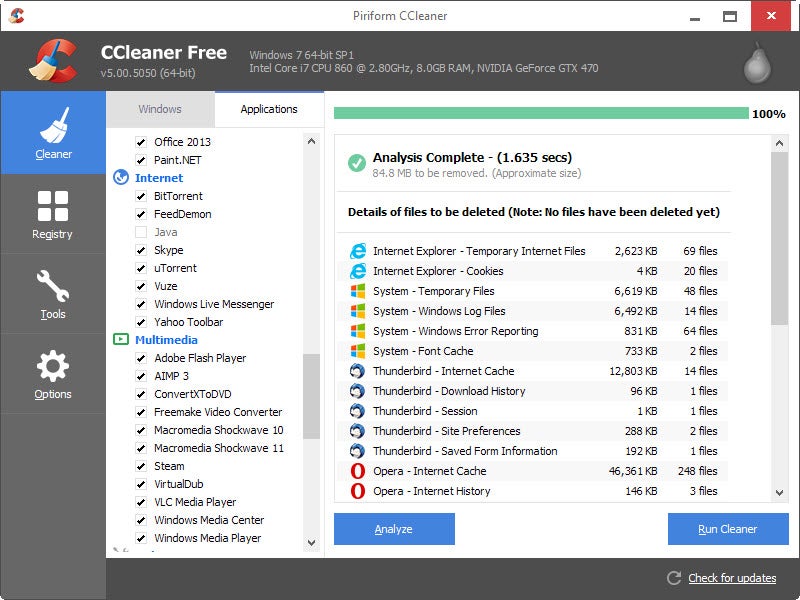
CCleaner is and remains the uncrowned king when it comes to freeing up disk space, cleaning up file remains and ridding your browser of unnecessary junk. We therefore can not avoid reporting this again. Have you not installed CCleaner yet? Do directly.
Tip 09: Trash
The basis of CCleaner consists of a cleaning study, followed by a cleaning action. CCleaner works best if you close all programs first. Start CCleaner and click Analyze for a preliminary examination and then click on Clean to perform the cleaning action. You can also click on Cleaning directly. This is similar to emptying your Windows Recycle Bin, but with extra polishes. This way temporary files are deleted, traces in your browser are undone and other remains are deleted.
If you have your trash can on your desktop (see tip 18), you’ll be ready even faster! Right-click your trash can and choose Run CCleaner. Is the option missing in the right-click menu of the trash? Open CCleaner and go to Options / Settings and place a check in CCleaner run (…).
[su_note]Add CCleaner to the right-click menu of your trash.[/su_note]
Tip 10: Automate
The previous tip can be done almost without thinking and only costs a few clicks. By automating CCleaner, you no longer have to put out a finger and your system is automatically stripped of unnecessary junk. Open CCleaner and go to Options / Settings. Place a check mark on Automatically clean the computer during startup. Every time you switch on your system, CCleaner performs a cleaning action. The more often you start CCleaner, the sooner the program is ready. With normal computing you hardly notice any delays and you probably always benefit from this setting.
Tip 11: Extra cleaning
CCEnhancer offers a kind of ‘extra cleaning trolley’ for CCleaner with cleaning instructions for more than 200 (!) Programs. In this way, you greatly expand the possibilities of CCleaner. CCEnhancer has nothing to do with the makers of CCleaner. Although we have not encountered any strange things, some caution is required. This also applies to all cleaning tools. Never make adjustments to your computer that you do not know what it is for or how you undo the changes.
[su_pullquote]CCEnhancer gives CCleaner even more possibilities.[/su_pullquote]
Recovery points and system recovery
A good backup is essential to repair your computer in case of problems or data versions (see box: ‘Backup’). Another safety net requires hardly any attention, but you do need to set it up once. We are talking about Windows System Restoration and mainly the recovery points. These are limited snapshots you can return to, for example if your computer does not start up. Windows System Restore works slightly differently in different Windows versions and that’s why we like to use Restore Point Creator. As soon as you start Restore Point Creator you get an overview of existing recovery points. If the overview is empty, the recovery points are probably disabled. Click on System restore point utilities / Manage system restore point storage space and determine how much space you want to allocate to the extra safety net.
Click Create system checkpoint to create a restore point with Restore Point Creator. You can also ensure that the program automatically creates a restore point every day (weekly or otherwise). Go to System restore point utilities / Schedule creation or system restore points.
Tip 12: Don’t Overdo it!
CCleaner is very extensive and thorough, but of course it is not the intention to clean things that you find useful. Take, for example, the passwords and cookies that your browser remembers so that you stay logged in with Facebook, Google, Marketplace or any other service. Walk along the list of parts to be cleaned and switch off the options you want to keep. With Options / Cookies you will find an overview of cookies found. Use the search function to find cookies that are important to your services and add them to the list of ‘preserve cookies’.
[su_note]Add cookies to the list of ‘preserve cookies’ to stay logged in to your favorite web services.[/su_note]
Tip 13: CCleaner Cloud
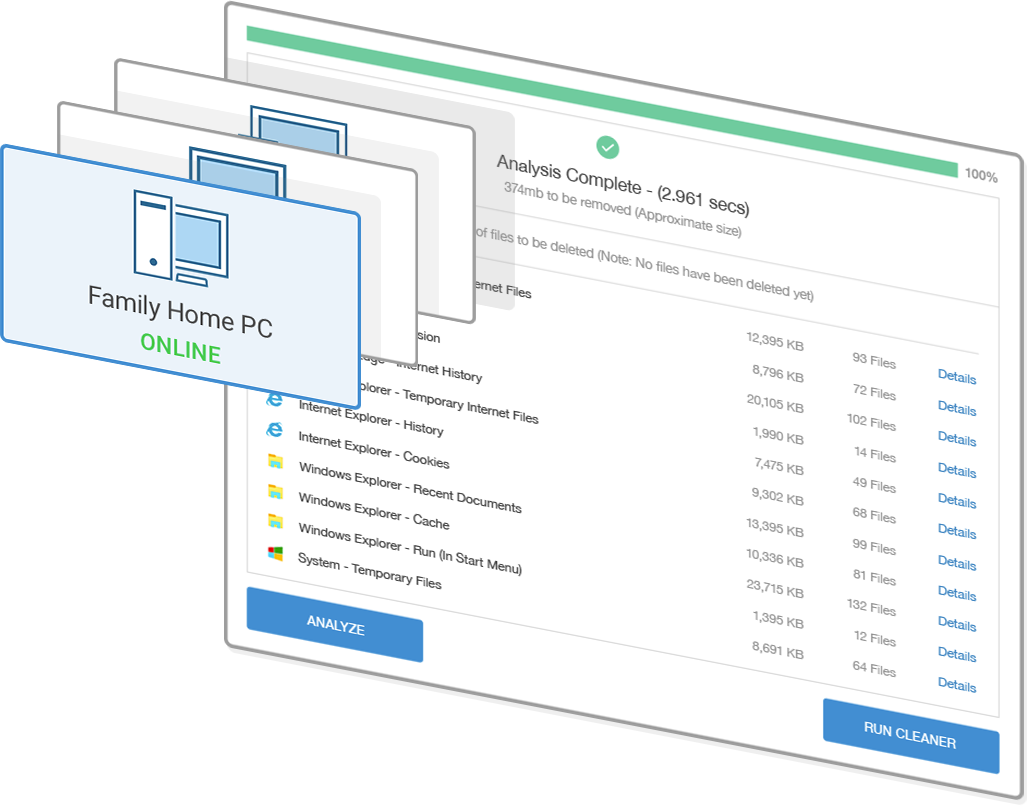
If you have or need to maintain multiple computers, you want to do this as easily as possible. The previous tips work excellently and take little time. You only need to set up the autopilot of CCleaner once and the rest goes automatically. The disadvantage is that you have little control. Thanks to CCleaner Cloud you get this and you can control CCleaner remotely via the internet. It is free for personal use up to three computers. In addition to cleaning actions, you can also read log files remotely, remove programs and install Windows Updates. In short: CCleaner Cloud is a must for every advanced computer user.
Tip 14: Disk cleanup
There is a reason not to use CCleaner and that is if you can not or do not want to install a program. In that case, Windows Disk Cleanup, found in your start menu, offers almost everything you need to clean your computer. Have your system researched and check which parts are allowed to erase Windows Disk Cleanup. There is a counter with it so you can see how much disk space it will produce.
Tip 15: More disk cleanup
There is one golden handle you can have with Windows Disk Cleanup and not by CCleaner. We are talking about cleaning up temporary Windows installation files. Start a Windows Disk Cleanup and click Clean up system files. The program is restarted with other options that you can check. At the previous tip we received a little more than 200 MB. With the extensive options that are now available, the cleaning action yields more than 4 GB (!). This is a considerable amount of disk space, especially if you have a tight SSD with little storage capacity. Take a good look at what data you can remove exactly.
Tip 16: SSD capacity
This tip also works on hard disks, but is much more useful if you have an SSD. With the limited storage capacity of an SSD, every free gigabyte is one! It is important to know if you are storing large unnecessary files somewhere. A good example of this is sample files from a video editing program or hundreds of high-res photos that are saved by a wallpaper program. TreeSize Free analyzes your ‘disk space’ and sorts your folders on storage space. Then you can browse through the contents of your folders and identify the space savers. Unlike CCleaner and Windows Disk Cleanup, TreeSize Free does not perform any cleaning actions. Use the right mouse button on a folder and choose Open to view the folder in your browser. Note: never delete files or folders that you do not know what it is for.
[su_note]TreeSize Free analyzes your disk space and shows you where most space explorers are located.[/su_note]
Tip 17: Cloud insightful
Most cloud services have a significant limitation when it comes to storage capacity, especially if you use a free version. For example, if your Dropbox is suddenly full, the service will stop syncing until the total file size falls within the limit. If you have a lot of folders, it is difficult to notice space keepers. TreeSize Free also helps here.
Make sure TreeSize Free is not active and start the Windows Explorer. Right-click the cloud service you want to investigate and choose TreeSize Free. TreeSize Free is restarted and shows the spatial distribution of your cloud storage on your computer. For example, if you like working with documents in Dropbox because of the excellent revision management, you might want to consider moving your movies and photos (which take up a lot of space) to a specialized cloud service for media files (for example Flickr or Google Photos).
Tip 18: Trash
If you do not want anything to do with cleaning tools, it is still useful to keep an eye on one Windows component: the trash can. By having them displayed on your desktop, you can easily keep an eye on them and empty them from time to time. No trash on your desktop? In Windows 10, right-click on your desktop. Go to Customize personal preferences / Themes / Settings for desktop icons and activate your trash. Use the right mouse button on your trash can to empty it or change the default settings via Properties. Here you can indicate how much space the trash can take and whether you want confirmation when you throw files into the trash.
Tip 19: Remove software
There are several reasons for removing programs that you no longer use. The main one is of course recovering disk space, but let’s not forget a potential start-up delay! If a program starts up with Windows itself, this will cost extra charging time. The default installation manager of Windows can be found via Control Panel / Programs / Programs and parts. Go through the list critically and delete all programs that you never use. Note: do not remove programs from this list that you do not know what it is for.
[su_note]Do you use all programs that are installed on your computer?[/su_note]
Tip 20: Remove 2.0
If you want to delete more than two programs, it is already worth trying Absolute Uninstaller. Absolute Uninstaller shows an overview of your programs. If necessary, sort on ‘program size’ via the column Size or choose Installation date to quickly view recent (or just old) installations. Click on Batch removal. All programs now have a check box. Select the programs you want to uninstall. Click on Unchecked programs to perform the correct procedure in succession.
[su_note]Tick all programs you want to remove and let Absolute Uninstaller guide this job.[/su_note]
Tip 21: Crapware
Crapware is a collective name for all programs that you find on your computer, but have never installed yourself. The junk is often pre-installed by the computer manufacturer. With a batch removal program as Absolute Uninstaller (tip 20) you can quickly remove multiple programs in succession, but for crapware there is a better option: Decrap My Computer. The program can be automated or via a simple wizard to remove the unnecessary programs. The wizard is preferred because you keep more control over your actions. Crapware mainly focuses on the ASUS, HP, Dell and Toshiba manufacturers, but also works with other PCs and laptops. Use Decrap My Computer preferably only on a new PC or laptop. The program is so thorough that you might otherwise accidentally have things removed that you have installed yourself.
Tip 22: Stubborn Software?
Some programs can not simply be removed. This occurs with security programs. Remaining leftovers unfortunately prevent the correct functioning of a new security program with all its consequences. Many software makers offer a bite-size solution for this type of problem and listens to the name ‘removal tool’. For example, if you search in Google for ‘norton removal tool’ you come to a program that can delete all old versions of Norton from your computer. This is just an example, there are also ‘removal tools’ for Office products, programs from Adobe, Acronis and many other software manufacturers.
[su_note]Encountered a stubborn problems during the removal of a program? Use a ‘removal tool’![/su_note]
Tip 23: Start faster
As soon as you turn on your computer, all kinds of programs are loaded. Some are necessary, such as your security software and cloud storage, but others can be missed. It is always difficult to determine what is essential or what you may not need. Startup Delayer can manage your startup process. Right-click an item and choose Disable selected. This will remove the program from the automatic start-up process, but you can also undo this adjustment easily via Enable selected. We recommend using the Delete selected option because you can not restore it.
Another interesting option is Delay selected. With this you can start unimportant programs delayed. For example, do this for the update program of your printer or other software that is not essential. In the end everything starts up, but important programs take priority and Windows starts faster. Again the warning: never disable parts that you do not know what it is for. Use the More information / Search Google option to identify unknown items.
Defragment and drivers
There are a number of things that we deliberately did not include in this article, for example defragmenting and having drivers updated by special software. A defragmentation option still occurs in some cleaning tools, but is not recommended. It hardly yields any gain, provided you have a very old computer and have skipped a few Windows versions. For SSDs, defragmentation can even be harmful.
Updating your drivers is best left to Windows Update because this procedure is the safest. The exception to this rule is your graphics card. Gamers benefit from the latest driver version. This can be found on the website of the makers of the display adapter, for example www.nvidia.com.
Additional software that promises to update all your drivers may be harmful to your computer. The programs are usually of poor quality, promise to be free but cost money if you want to update something and often install all kinds of junk.
Tip 24: Windows updates
A healthy computer is a computer that has the latest Windows Updates. The place where you find everything about Windows Updates differs per Windows version. If all goes well, they are automatically installed and you do not have to worry about this. If you want to make sure you get all the patches for your Windows version you can use Windows Update Notifier. The program is hidden in your system tray and gives a clear message when there are updates that are not yet present on your computer. Then Windows Update Notifier brings you to the right place in Windows within a few clicks to get the updates. Windows Update Notifier officially does not support Windows 10. In Windows 10, the built-in update function is already much better than in the previous Windows versions.
Tip 25: Security risk
On most computers, a fixed set of programs can be found next to Windows. These programs are therefore very interesting for hackers to attack. You can arm yourself against this by getting the most recent version, but that is sometimes forgotten. WIGI is an abbreviation with a wink and stands for WhyIGotInfected. The program checks whether you have the most recent version of potential risk programs. This includes Internet Explorer, Java, Firefox, software from Adobe and service packs for Windows. WIGI performs a check and gives a red mark when a newer version is available. You can then retrieve and install these within a few mouse clicks.
[su_note]WIGI checks whether programs with a potential security risk are up to date.[/su_note]
Tip 26: Recent version
The previous tip only updates the programs that pose a high risk at the time they age when you ‘forget’ to install the latest version. Patch My PC goes a few steps further and also looks at other popular programs. The list is too long to mention, but chances are that you use a lot of this software. Patch My PC performs a check, shows which programs are outdated, retrieves the most recent version and installs it for you.
Tip 27: Automatic updates
By default you have to start Patch My PC manually, after which the program checks whether you have the latest version of all your programs. You can do everything with one extra mouse click, but it can be simplified by automating Patch My PC. Start the program and click Schedule. Activate a monitoring time, for example Once a week to search for new versions every week. Choose Yes from Include Windows Update if you want Patch My PC to also check your Windows Updates. If all goes well, Windows will already do that itself, but better to look twice than once. If you activate Silent run, you notice (almost) nothing of the Patch My PC update process and everything goes automatically.

